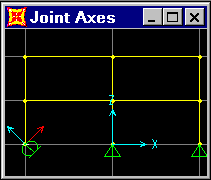
Form: Joint Local Axis, Joint Advanced Axis
By default, the joint local 1-2-3 coordinate system is identical to the global X-Y-Z coordinate system. However, it may be necessary to use different local coordinate systems at some or all joints in the following cases: skewed restraints (supports) are present; constraints are used to impose rotational symmetry; constraints are used to impose symmetry about a plane that is not parallel to a global coordinate plane; the principal axes for the joint mass (translational or rotational) are not aligned with the global axes; and joint displacement and force output is desired in another coordinate system.
Joint local coordinate systems need only be defined for the affected joints. The global system is used for all joints for which no local coordinate system is explicitly specified. Advanced methods are available to define a joint local coordinate system. These may be used separately or together. Local coordinate axes may be defined to be parallel to arbitrary coordinate directions in an arbitrary coordinate system or to vectors between pairs of joints. In addition, the joint local coordinate system may be specified by a set of three joint coordinate angles.
Select one or more joints to be assigned the same local axes. Other types of objects may be selected because they will not be affected by this assignment.
Click the Advanced > Assign > Joints > Local Axes command to access the Joint Local Axis form.
Type in a value for rotation angles about the Z, Y’ and X” axes, in degrees (Y’ and X” are used as axes names instead of Y and X to emphasize that the local X and Y axes will change after an angle about Z has been specified).
Check the Use default (Global) check box if the Global definition is to be used for the local axes.
If appropriate, check the Advanced Axes check box and click the Advanced button to access the Joint Advanced Axes form. Use the Joint Advanced Axis form to refine the specification of the local axes for the selected object(s).
Local Axes Type options.
Default option. When the Default option is selected, the other areas of the form are not available and no further input is required. This is the default.
Advanced option. When the Advanced option is selected, the input required on the form changes depending on the options selected in the Axial Reference Vector Specified by and Plane Reference Vector Specified by areas of the form.
Local Plane drop-down list.- Select the local plane for the joints from the drop-down list.
Axial Reference Vector Specified by area. Choose one of the following options to specify how the axial reference vector will be specified:
Coordinate Direction option. When this option is selected, the form will display a Coordinate System drop-down list and an Axial Coordinate Direction area with a Direction drop-down list. For the reference vector, choose the coordinate system and then the direction from the drop-down lists.
Two Joints option. When this option is selected, the lower portion of the form will display a Two Joints for Axial Reference Vector area with Axial Joint 1 and Axial Joint 2 drop-down lists. The lists consist of the joints included in the model and a None selection. Choose the two joints to be used to specify the axial reference vector.
User Vector option. When this option is selected, the form will display a Coordinate System drop-down list and a User Axial Reference Vector area with edit boxes for Axial Vector X, Axial Vector Y, and Axial Vector Z. Select the coordinate system and then enter coordinate values in the edit boxes to specify the axial reference vector.
Plane Reference Vector Specified by area. Choose one of the following options to specify how the plane reference vector will be specified:
Coordinate Direction option. When this option is selected, the form will display a Coordinate System drop-down list and a Plane Coordinate Direction area with Primary and Secondary Dir (Direction) drop-down lists. Select the coordinate system for the reference vector and then choose a coordinate direction from each drop-down list.
Two Joints option. When this option is selected, the lower portion of the form will display a Two Joints for Plane Reference Vector area with Plane Joint 1 and Plane Joint 2 drop-down lists. The lists consist of the joints included in the model and a None selection. Choose the two joints to be used to specify the plane reference vector.
User Vector option. When this option is selected, the form will display a Coordinate System drop-down list and a User Plane Reference Vector area with edit boxes for Plane Vector X, Plane Vector Y, and Plane Vector Z. Choose the coordinate system for the reference vector and then enter coordinate values in the edit boxes to specify the plane reference vector.
EXAMPLE:

See Also